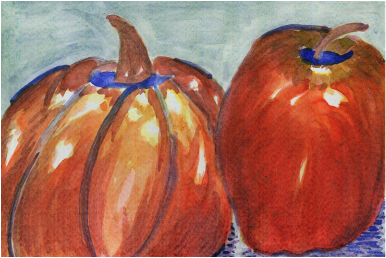
This is a water color painting of an apple overlapping (in front of) a small, miniature pumpkin. This is my second classroom blog posted since using the watercolors. My first blog using the watercolors was just a painting of a plain apple. After viewing the watercolor tutorial, I have learned many dos, and don’ts.
The first thing that I realized after the tutorial was that in my plain apple watercolor painting, the apple is floating around in the abyss of space. Secondly that there are no white spots in the painting to give the painting or objects depth. Therefor the apple has no light and if there are no light spots then the apple appears to be a flat circle instead of a round three- dimensional object. Lastly, the paint on the first apple is too dry which therefor allows no blending of colors to give the apple a realistic look.
In this most recent painting of an apple overlapping a minuscule pumpkin, there are all these important tutorial concepts in the painting. The colors ran, there are a few more visible outlined spots to give the appearance of spin on both objects, white spots to give a three- dimensional look and show there is some depth and the appearance that the objects have a slight bulge outward.
 RSS Feed